

Step 1: APM Ground Connection

-
Locate the temperature sensor mounting location on the body of the alternator. Use a 10mm socket to remove the bolt.
-
Place the bolt and the washer that was removed through the negative (black wire) terminal of the APM. Next place the temperature sensor onto the wire as shown.
-
On some temperature sensors (2023+ Revel) the hole diameter of the sensor terminal is larger. Make sure to use the large washer that was originally used on the temperature sensor or a suitable replacement. If a washer is not used the temp sensor will not be properly secured.

-
-
Place the bolt with the washer, APM ring terminal, and the temperature sensor onto the mounting location on the body of the alternator and tighten the bolt snug with a 10mm socket.
It is very important the temperature sensor has direct contact with the case on the alternator. Ensure the order on the bolt is as follows: Bolt, washer, APM terminal, temperature sensor.

Step 2: APM Positive Connection
-
Place the positive ring terminal of the APM (red wire) onto the positive stud of the alternator on top of the larger positive cable as shown in the image.
-
Ensure the large gauge positive cable is put onto the alternator stud first, then the APM ring terminal.

-
-
Install the flat washer, lock washer, and nut in that order. Tighten the nut with a 13mm socket and wrench until the nut is snug.
- Slide the protective boot (if applicable) over the positive cables as shown below.
The large positive cable MUST be placed first onto the output stud on the alternator, then followed by any auxiliary connections (like the APM used in this guide) to ensure proper connection.

Step 3: APM Securement
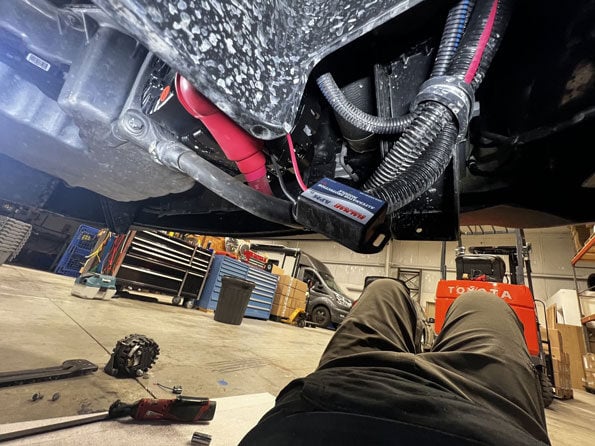
-
Using three zip ties secure the APM to either the positive or ground wire as shown.
-
Two zip ties are placed through the mounting slots, and a third zip tie goes over the body of the APM.

-
Trim the tails of the zip tie flush.
Last updated: 09/2024