This upgrade converts current RoamRig Stage 2 systems to a Stage 3 system. For Stage 1 systems, this upgrade adds battery capacity but does not add a secondary alternator for speedy charging, so we call it a Stage 1.5 upgrade.
Please contact us if this is an upgrade you are interested in.
Step 1: Disassembly
- Disconnect from shore power
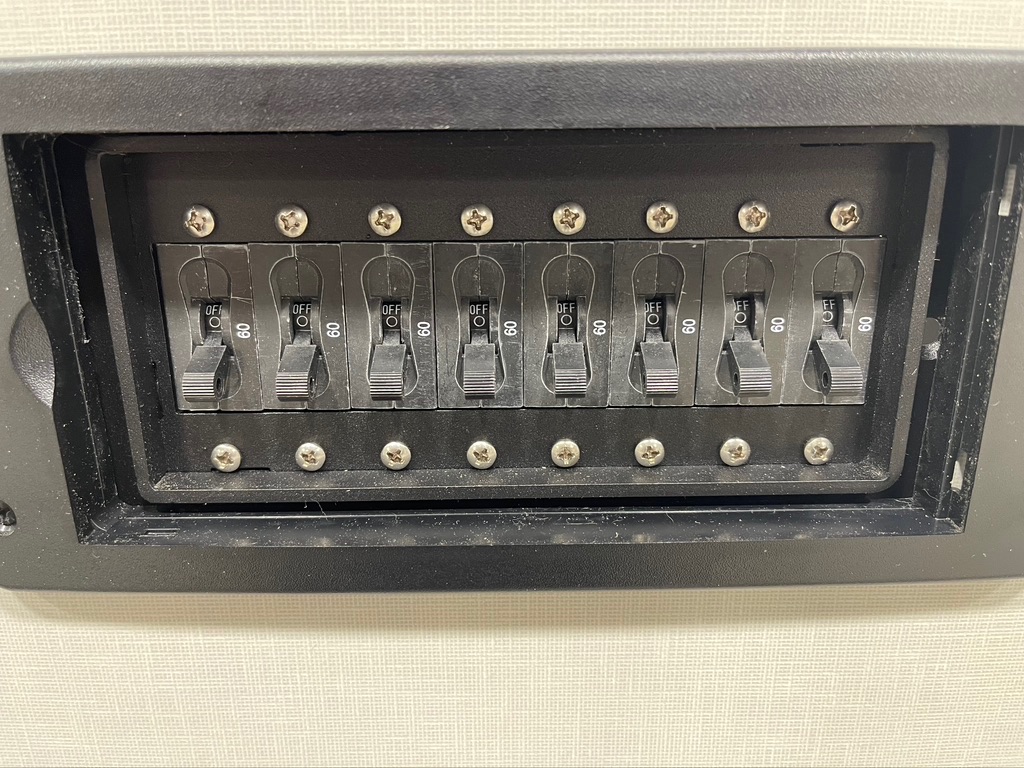
- Turn off all breakers on the front of the RoamRig power system (battery 1-4, DC panel, and solar/alternator)
- Remove bench seat cushions
- Unscrew and remove plywood cushion base
- Remove any cable clamps installed on battery cables
- Use a 10mm wrench/socket to remove all battery cable bolts holding the cable lugs to the batteries
- Remove all batteries by lifting them out of the frame
- Cut any zip ties holding wires to the positive bus bar
- Use a ½” or 13mm socket to remove nut and washers from the end of the positive bus bar where it is attached to the inverter
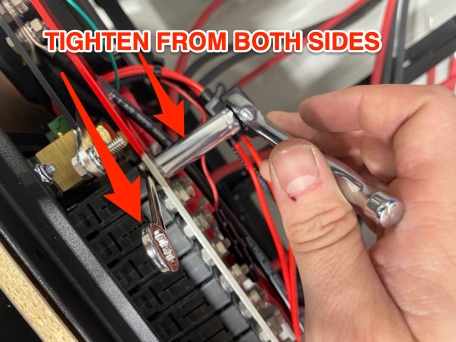
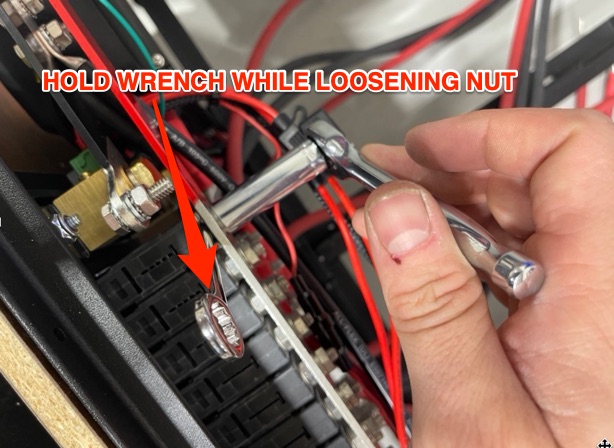
- Use a 7/16” or 11mm wrench and a 7/16” or 11mm wrench or socket to remove nuts/washers securing the positive bus bar to all 6 circuit breakers. NOTE: YOU MUST USE A WRENCH TO “HOLD” THE NUT BETWEEN THE BUS BAR AND BREAKER WHILE YOU LOOSEN THE OUTER NUT SO THAT YOU DO NOT BREAKER THE STUDS OFF THE BREAKERS. Reinstall nuts/washers on the breakers hand-tight
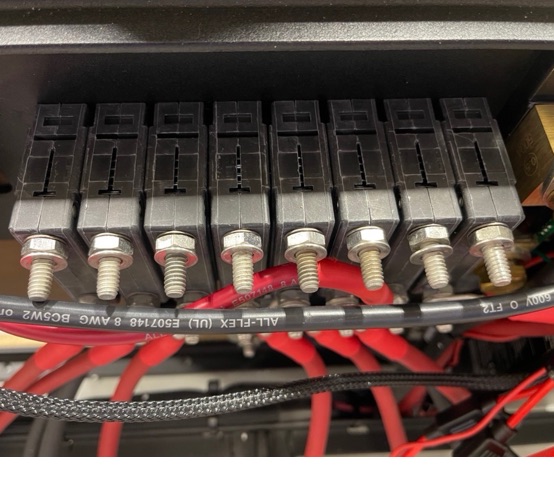
- Use a 7/16” or 11mm wrench and a 7/16” or 11mm wrench or socket to remove nuts/washers securing the positive wires to all 4 80A breakers for the batteries. NOTE: YOU MUST USE A WRENCH TO “HOLD” THE NUT BETWEEN THE BATTERY CABLE LUG AND BREAKER WHILE YOU LOOSEN THE OUTER NUT SO THAT YOU DO NOT BREAKER THE STUDS OFF THE BREAKERS. Reinstall nuts/washers on the breakers hand-tight after removal
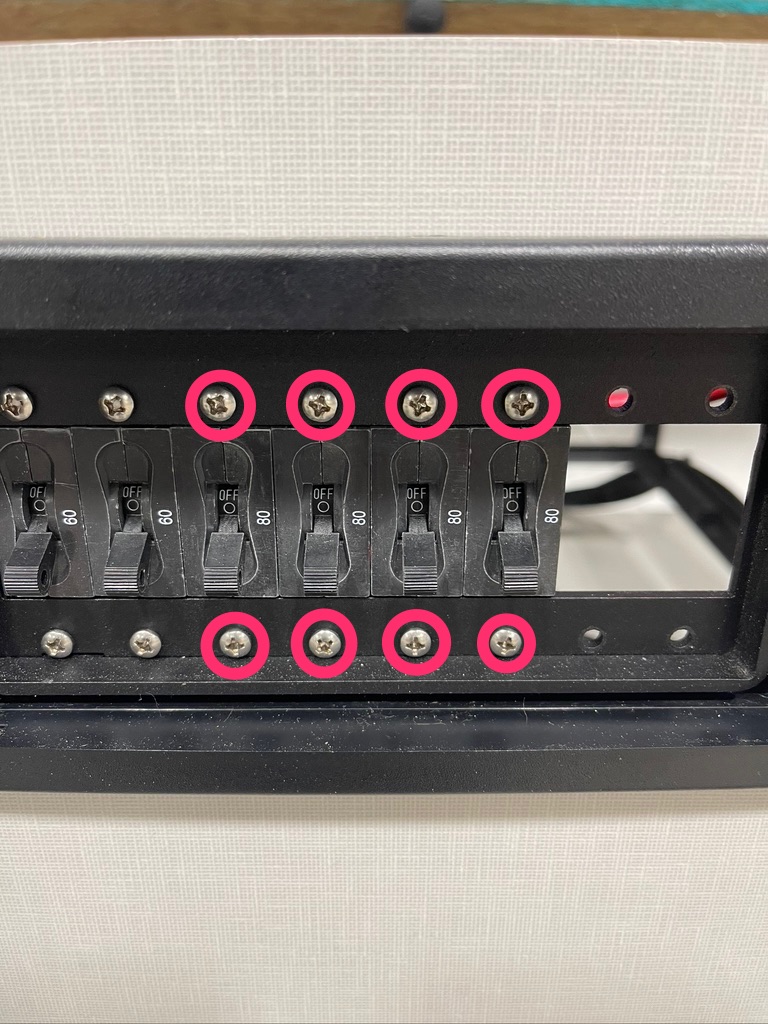
- Use a #2 phillips screwdriver to remove the screws holding the breakers to the system frame. Slide breakers out of the system and reinstall screws in breakers.
Step 2: Assembly
- Remove outer nuts and both washers (leave inner nuts) from both studs of 6 included 60A breakers.
- Install 6 included 60a breakers in the open breaker positions and tighten breaker mounting screws with a #2 screwdriver.
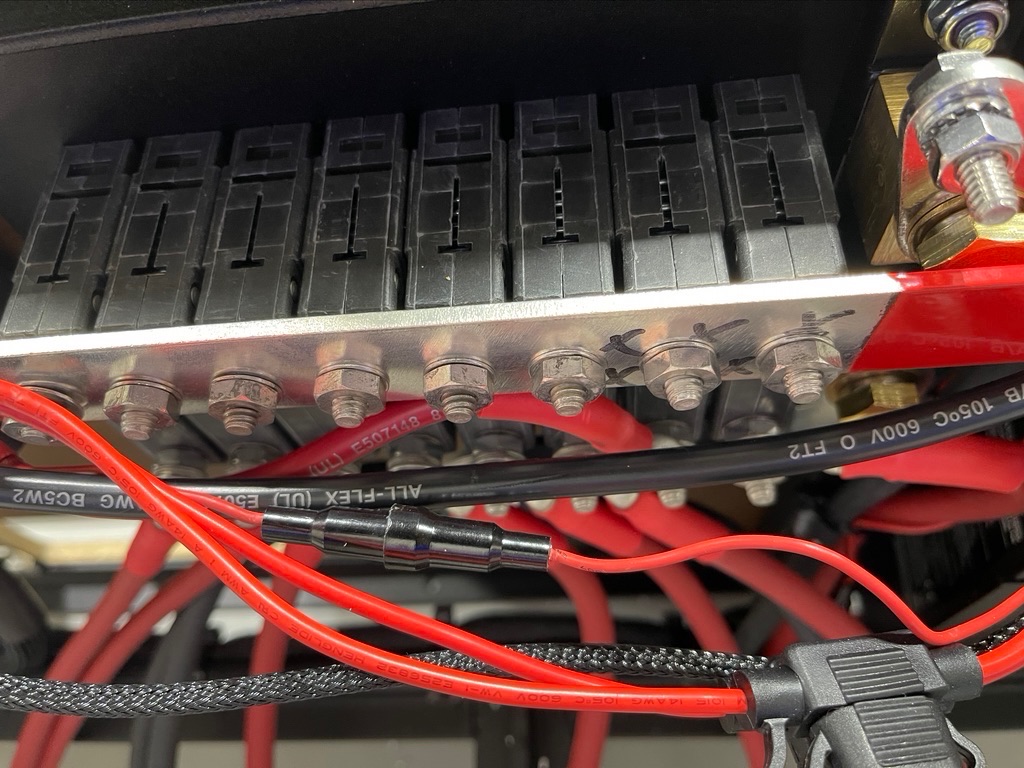
- Put inner washer over the top stud of each breaker and place bus bar over studs
- Put outer washer and nut on each stud and finger tighten
- Use a 7/16” or 11mm wrench and a 7/16” or 11mm wrench or socket to tighten the nuts against the bus bar. DO NOT JUST TIGHTEN THE OUTER NUT AND TRY TO PUSH THE BUS BAR INTO THE INNER NUT, THE STUDS CAN EASILY BREAK OFF THE BREAKER IF YOU DO THIS! Tighten to approximately 5 ft-lbs. These DO NOT need to be very tight, snug plus a bit more is fine.
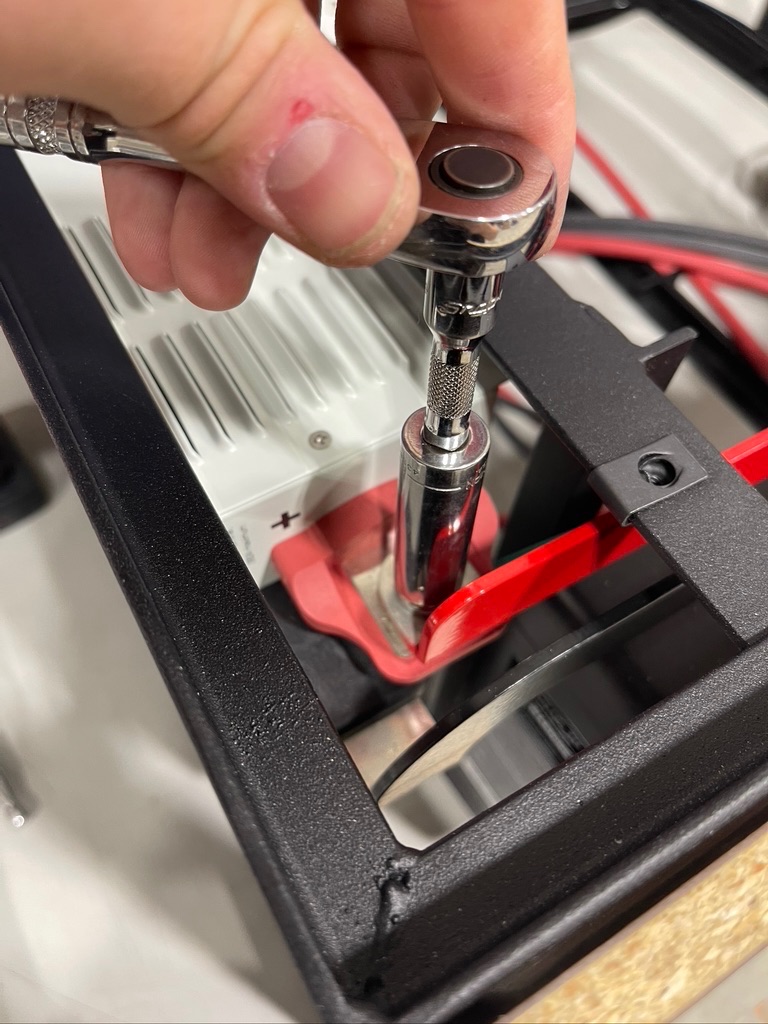
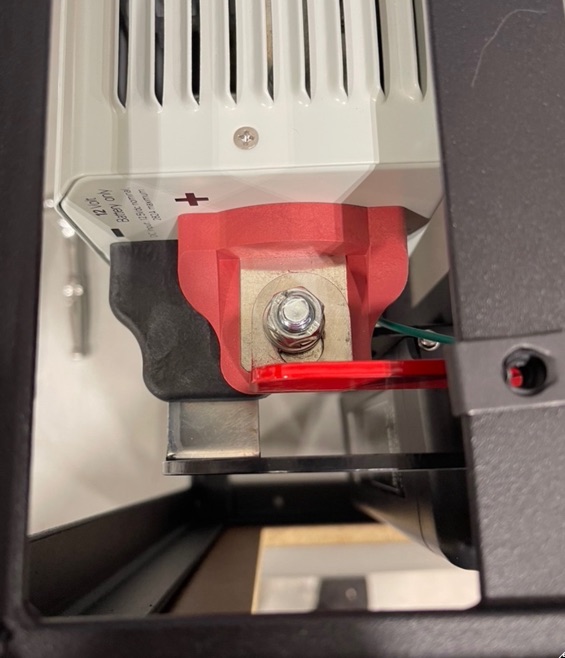
- Use a ½” or 13mm socket to tighten the nut w/ washers where the bus bar connects to the inverter.
- Place washers, wires, and nuts over the bottom side of the breakers. Use two wrenches or a wrench and a socket like the above steps to prevent breaking the studs off the breakers.
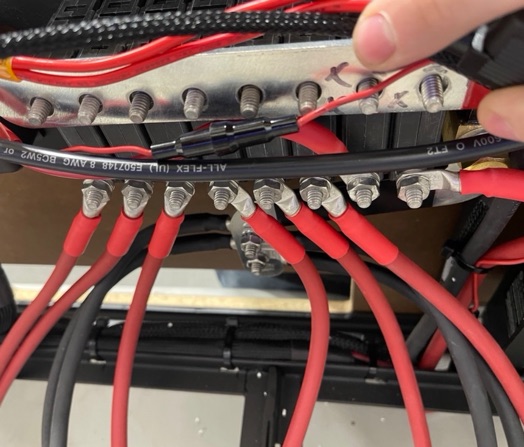
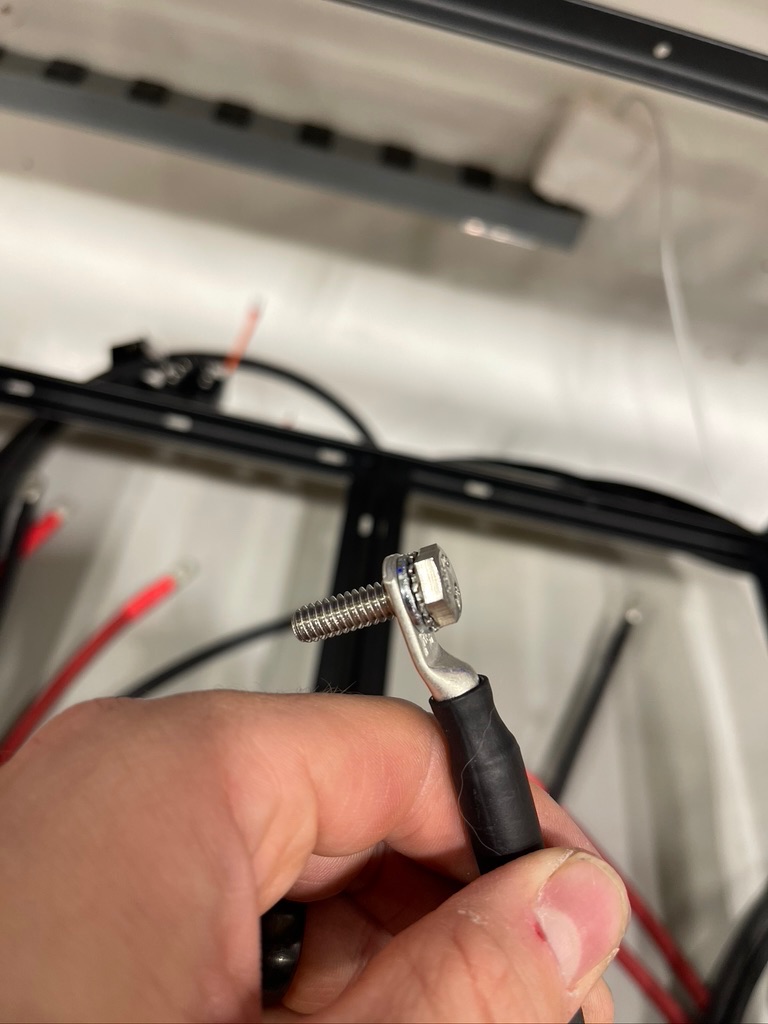
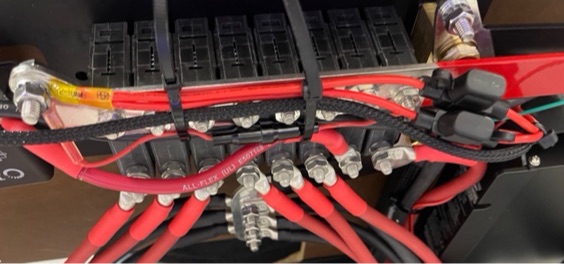
- Install new negative cables using ¼” - 20 bolt/washers/nut as pictured below and tighten with a 7/16” wrench or socket.
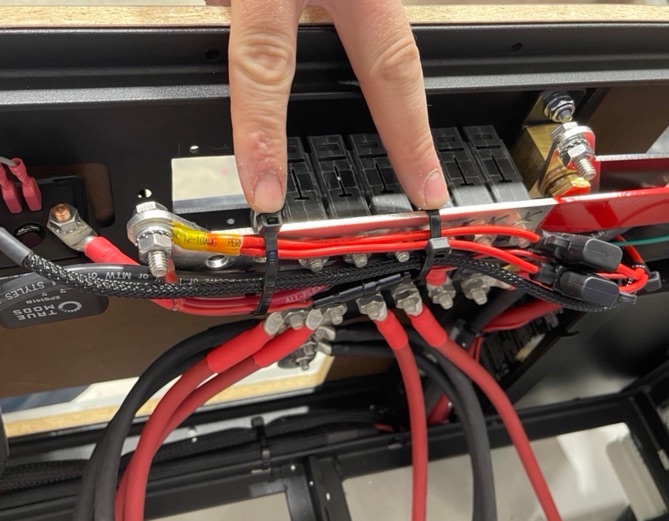
- Resecure wires to the positive bus bar with zip ties. DO NOT OVERTIGHTEN ZIP TIES AND ADD STRAIN TO WIRES OR FUSE HOLDERS.
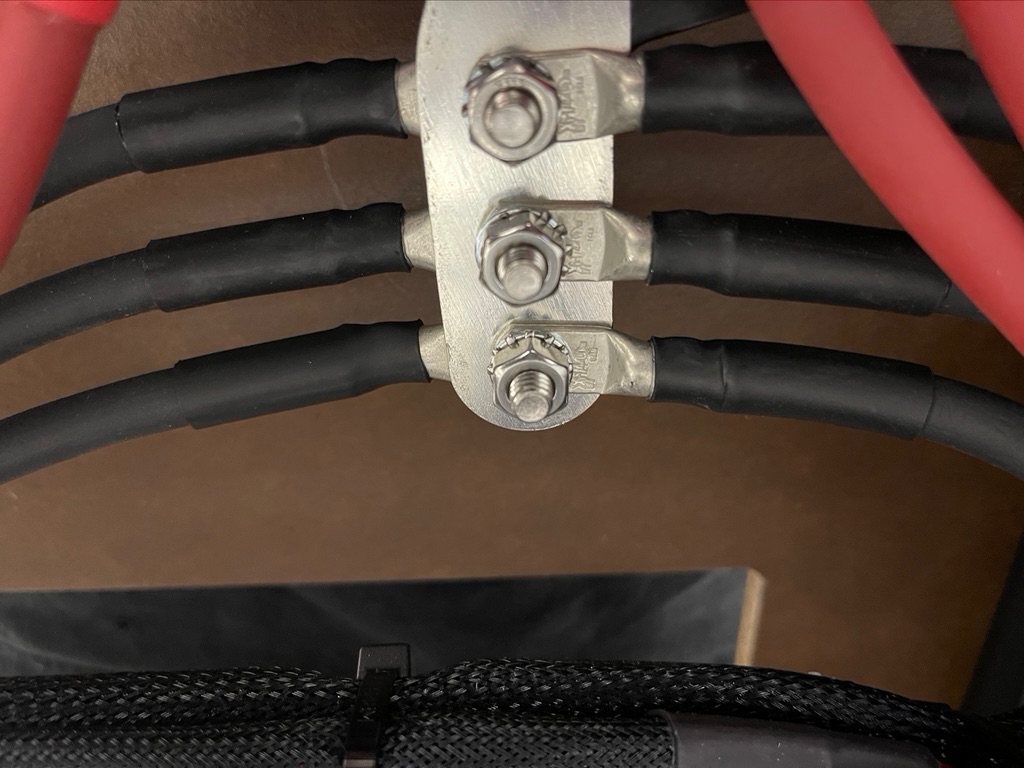
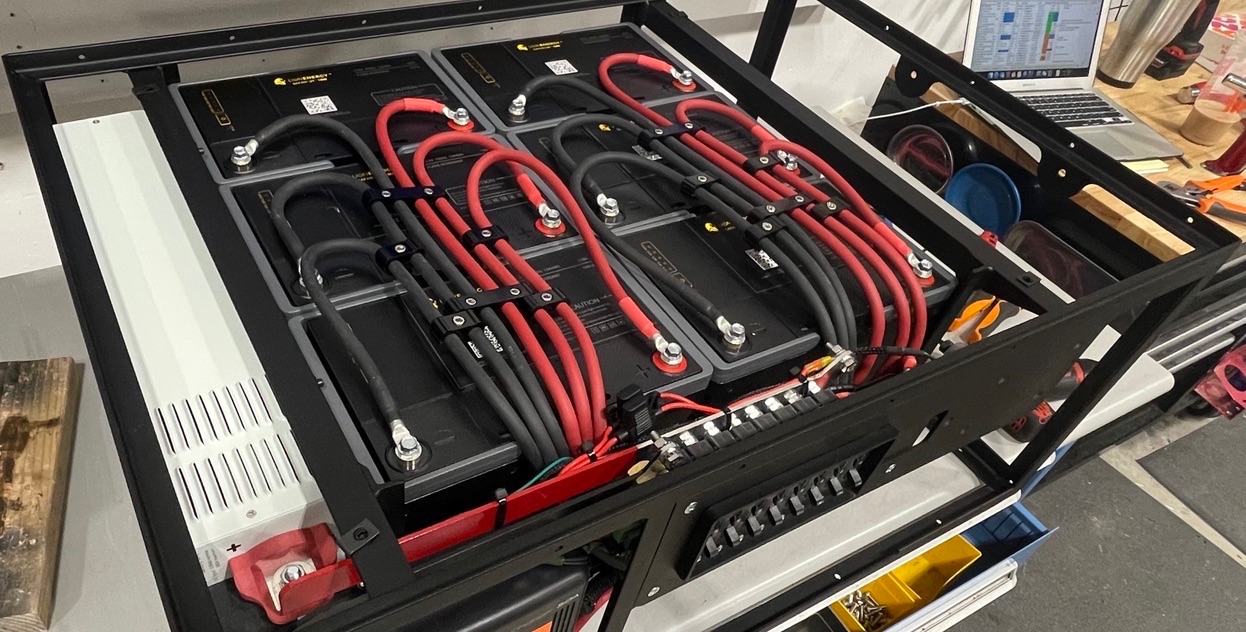
- Position battery cables as seen in the photo below before putting the batteries in place.
- Remove two new batteries from shipping boxes and use a 14mm wrench to remove the extension posts. Discard extension posts and included wing nuts + washers.
- Put all six batteries in place with terminals facing forward. Connect cables to batteries with M6 flange bolts. DO NOT OVERTIGHTEN TERMINALS! THEY NEED TO BE SNUG AND NOT MUCH MORE! Use the included wire separators to organize the wires as shown below.
- Put the included adhesive foam on the top of the 2 new batteries so that the wooden seat base holds them down
- Turn on the DC panel breaker, house power switch, and lights
- Turn on each battery breaker individually to ensure that each battery is working
- After ensuring that each battery is working, turn all the battery breakers on along with the solar/alternator breaker
- Change the battery capacity setting to 630ah in the Victron battery settings screen
- Replace the bench seat plywood and cushion.